

Nothing smells better or tastes better than a loaf of homemade sourdough bread! Cutting a slice, toasting it lightly, and then filling all those airy holes with butter, is a tiny piece of heaven.
I’ve mentioned in a few of my bread posts recently, how I took a sourdough bread making class. At class we each received a tiny dollop of starter to help us on our way. After somehow keeping my starter alive, and having massive amounts of it bloom, and sharing the starter myself, I realized that I better get the recipe down before I lost the precious piece of paper with the instructions on it.
As mentioned above, I’ve kept my starter going with roaring success. And this is even with only weekly feedings and being kept in the fridge! I wasn’t overly diligent in doing it weekly either, and sometimes the feedings stretched to two weeks. When this happens and I take the jar out of the fridge, there is a liquid that is on top – if this happens for you, just pour it off and continue with the … well… sludgy mess left behind.
Rereading the instructions, I realized that my feedings were on the generous side. Actually, more of a “feeding an army sourdough bread” side. Instructions from the class were to take the starter, remove 15 grams of it, adding 30 grams of luke warm water and 30 grams of bread flour, tossing whatever was left behind.
 If you’d like more starter for multiple loaves, or you plan on sharing it, you can take a larger portion and measure out the same 2:2:1 ration (so 50g of base starter, to 100g of flour and 100g of water). I like to feed my starter, then let it sit with the lid slightly off overnight. Then in the morning I pop into the fridge for another week.
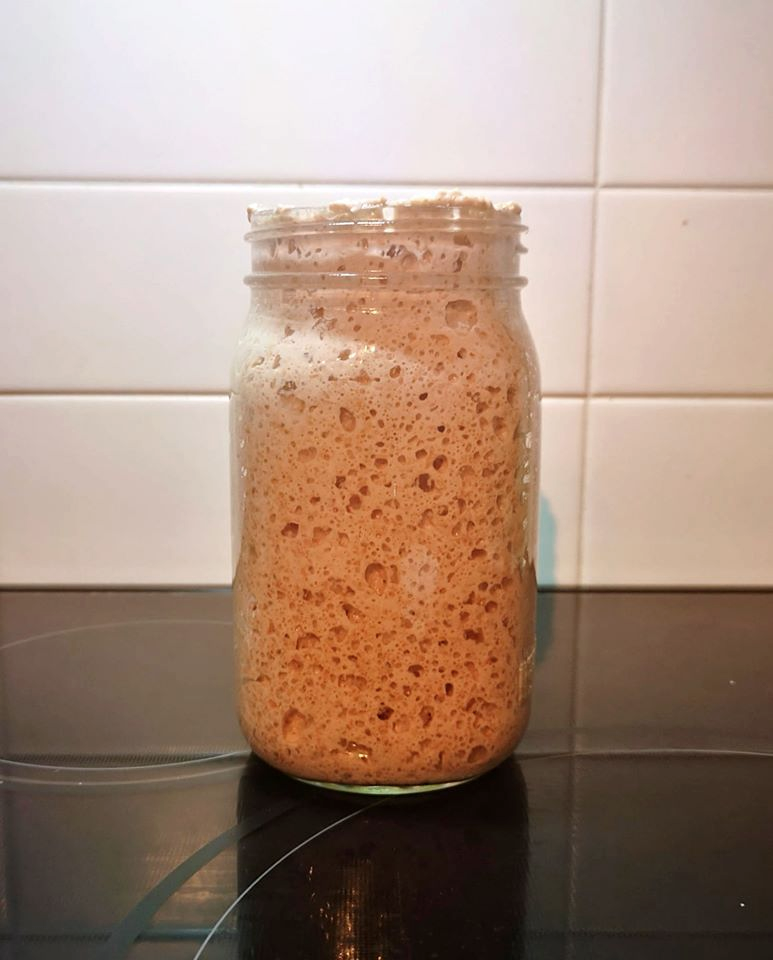
Note that if you start with 100g of starter and add 200g of water and flour, you will get a lot of starter.
I mean A LOT. Case in point…. this actually bloomed enough that the lid almost fell off.
So I’ll be following a more conservative feeding schedule and start with 50g maximum of starter. Even though it galls me to no end to throw out the remainder, I can realistically only give it away to so many people before I started getting blocked on Facebook.
Starter Care
Ingredients
- 25 grams starter
- 50 grams lukewarm water
- 50 grams bread or whole wheat flour
Instructions
- Measure out 25 grams of the starter (up to 50 grams), and add double the grams of lukewarm water, stirring with your fingers to mix. Discard unused portion.
- Add the same amount of bread or whole wheat flour as you did water and stir to mix.
- Place in a large jar and set in a warm spot for 12-24 hours, before placing the lid on and putting in fridge.
- Do weekly. (Drain off any liquid that may be on top before measuring out your next 25g.)
I wanted to mention that making sourdough bread is a time investment. A tasty tasty time investment, but it will take a couple of days. I cheat a little bit by just using a 100g of starter right away instead of separating 25g and adding 50g water and 50g of flour, letting sit and using 100g of that. But I will add that step below.

Sourdough Bread
Ingredients
Leaven
- 25 grams starter
- 50 grams lukewarm water
- 50 grams bread flour
The Bread
- 100 grams leaven
- 500 grams bread flour
- 325 grams lukewarm water
- 25 grams lukewarm water (additional)
- 10 grams sea salt
Other
- rice flour (for dusting)
Instructions
Making the Leaven
- Combine the leaven ingredients and leave to ferment for 8 to 12 hours. The leaven is ready if you pinch a bit off and it floats on water. If it sinks, it needs to ferment a bit longer.
Mix and Autolyse
- Combine the 100 grams of leaven with 325 grams of water, mixing with your fingers.
- Add the flour to the mixture, again using your hands to combine.
- Cover the bowl with a tea towel and let sit for up to an hour.
- Add the 25 grams of water and salt.
Turning
- Begin your first fold by getting your hands damp, then taking a piece of dough, gently pulling out and up and folding towards the middle. Rotate the bowl 90° and repeat 3 times.
- Do 4 folds every 30 minutes for 3 hours. Rinse your hands off each time, do not use soap.
Shaping
- Wet the clean surface of your countertop with some water that has been sprinkled on top and then spread around with your hand. Scoop the dough out of the bowl, form into a rough rectangle.
- Let rest for 20 minutes.
- Line your banneton (or bread-rising bowl) with a clean linen towel and dust generously with rice flour.
- Finish shaping by folding your rectangle into thirds. Flip over so it's seam side down.
- Use your hands (or a bench scraper) to cup and roll the dough, making as much surface tension as possible (without ripping the dough).
- Flip the dough into the lined and floured bowl so the top is facing down.
- Flour the dough with rice flour then cover with the edges of the towel.
Proofing
- Proof in the fridge for up to two days, but not longer than 48 hours.
Baking
- Preheat your oven to 500°F and place a dutch oven (and it's lid) inside to heat up with the oven.
- Cut a piece of parchment paper to have a set of handles. Uncover the dough.
- Place the parchment paper centered over the bowl, and flip confidently over onto the parchment paper. Remove the bowl and the towel.
- Dust the top of the ball lightly with bread flour and score with a sharp blade or bread lame in an "X" or hashtag pattern. Make sure to score under the edges of the corners lightly. This will help with the rising during baking.
- Once the oven is heated, remove the pot carefully, remove its lid, and using the "handles" of the parchment paper, place the loaf into the pot.
- Put the lid back on and bake for 20 minutes.
- Remove the lid and bake an additional 20-25 minutes until the loaf is a toasty brown.
- Once cooked, remove immediately from the pot and place on a wire rack to cool.
- Cool completely before cutting.
Storage
- Store in a bread box or bread bag.